Authentication
Intro
Django Ninja provides several tools to help you deal with authentication and authorization easily, rapidly, in a standard way, and without having to study and learn all the security specifications.
The core concept is that when you describe an API operation, you can define an authentication object.
In this example, the client will only be able to call the pets method if it uses Django session authentication (the default is cookie based), otherwise an HTTP-401 error will be returned.
Automatic OpenAPI schema
Here’s an example where the client, in order to authenticate, needs to pass a header:
Authorization: Bearer supersecret
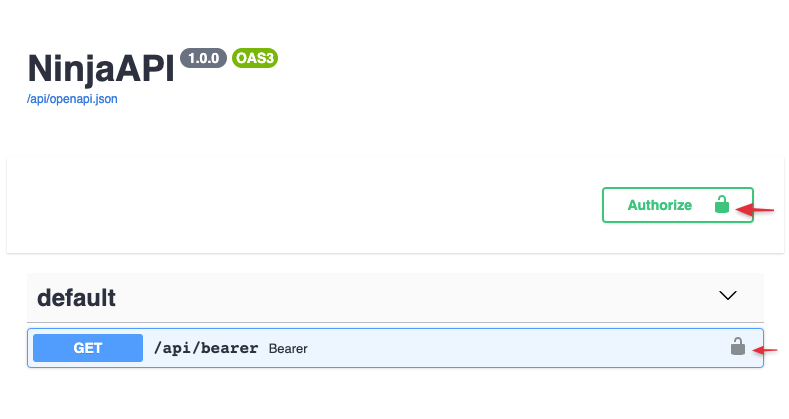
Now, when you click the Authorize button, you will get a prompt to input your authentication token.

When you do test calls, the Authorization header will be passed for every request.
Global authentication
In case you need to secure all methods of your API, you can pass the auth argument to the NinjaAPI constructor:
And, if you need to overrule some of those methods, you can do that on the operation level again by passing the auth argument. In this example, authentication will be disabled for the /token operation:
Available auth options
Custom function
The » auth= » argument accepts any Callable object. NinjaAPI passes authentication only if the callable object returns a value that can be converted to boolean True. This return value will be assigned to the request.auth attribute.
API Key
Some API’s use API keys for authorization. An API key is a token that a client provides when making API calls to identify itself. The key can be sent in the query string:
or as a request header:
Django Ninja comes with built-in classes to help you handle these cases.
in Query
In this example we take a token from GET[‘api_key’] and find a Client in the database that corresponds to this key. The Client instance will be set to the request.auth attribute.
Note: param_name is the name of the GET parameter that will be checked for. If not set, the default of » key » will be used.
in Header
in Cookie
HTTP Bearer
HTTP Basic Auth
Multiple authenticators
The auth argument also allows you to pass multiple authenticators:
Router authentication
Use auth argument on Router to apply authenticator to all operations declared in it:
or using router constructor
Custom exceptions
Raising an exception that has an exception handler will return the response from that handler in the same way an operation would:
Routers
Real world applications can almost never fit all logic into a single file.
Django Ninja comes with an easy way to split your API into multiple modules using Routers.
Let’s say you have a Django project with a structure like this:
To add API’s to each of the Django applications, create an api.py module in each app:
Then do the same for the news app with news/api.py :
Finally, let’s group them together. In your top level project folder (next to urls.py ), create another api.py file with the main NinjaAPI instance:
It should look like this:
Now we import all the routers from the various apps, and include them into the main API instance:

Router authentication
Use auth argument to apply authenticator to all operations declared by router:
or using router constructor
Router tags
You can use tags argument to apply tags to all operations declared by router:
or using router constructor
Nested routers
There are also times when you need to split your logic up even more. Django Ninja makes it possible to include a router into another router as many times as you like, and finally include the top level router into the main api instance.
Basically, what that means is that you have add_router both on the api instance and on the router instance:
Now you have the following endpoints:
Great! Now go have a look at the automatically generated docs:
Operations parameters
You can group your API operations using the tags argument ( list[str] ).
Tagged operations may be handled differently by various tools and libraries. For example, the Swagger UI uses tags to group the displayed operations.
Router tags
You can use tags argument to apply tags to all operations declared by router:
Operation: Summary
Summary is a human-readable name for your operation.
By default, it’s generated by capitalizing your operation function name:

If you want to override it or translate it to other language, use the summary argument in the api decorator.

Operation: Description
If you need to provide more information about your operation, use either the description argument or normal Python docstrings:
When you need to provide a long multi line description, you can use Python docstrings for the function definition:
OpenAPI operationId
The OpenAPI operationId is an optional unique string used to identify an operation. If provided, these IDs must be unique among all operations described in your API.
If you want to set it individually for each operation, use the operation_id argument:
If you want to override global behavior, you can inherit the NinjaAPI instance and override the get_openapi_operation_id method.
It will be called for each operation that you defined, so you can set your custom naming logic like this:
Operation: Deprecated
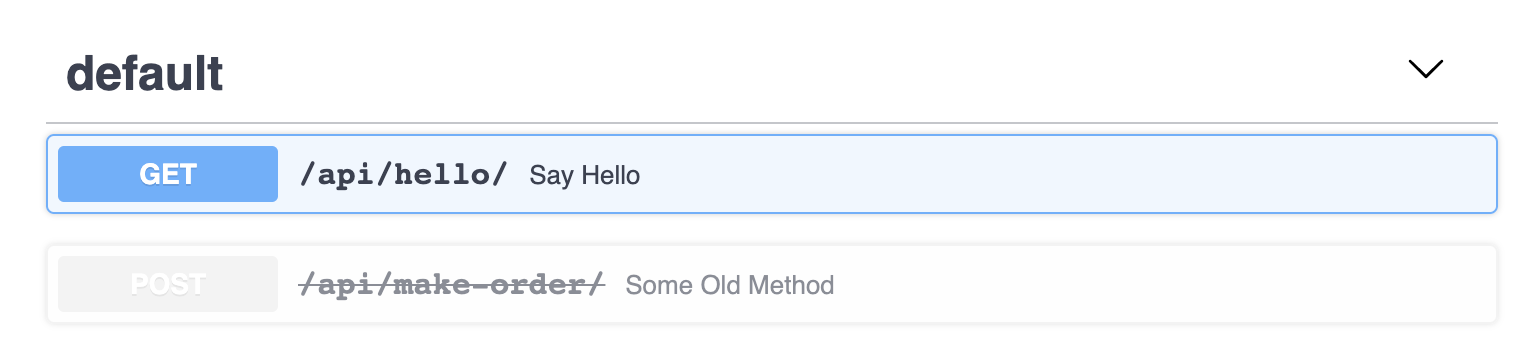
If you need to mark an operation as deprecated without removing it, use the deprecated argument:
It will be marked as deprecated in the JSON Schema and also in the interactive OpenAPI docs:
Response output options
There are a few arguments that lets you tune response’s output:
by_alias
Whether field aliases should be used as keys in the response (defaults to False ).
exclude_unset
Whether fields that were not set when creating the schema, and have their default values, should be excluded from the response (defaults to False ).
exclude_defaults
Whether fields which are equal to their default values (whether set or otherwise) should be excluded from the response (defaults to False ).
exclude_none
Whether fields which are equal to None should be excluded from the response (defaults to False ).
Include/Exclude operation from schema(docs)
If you need to exclude some operation from OpenAPI schema use include_in_schema argument:
url_name
Allows you to set api endpoint url name (using django path’s naming)
Response Schema
Django Ninja allows you to define the schema of your responses both for validation and documentation purposes.
Imagine you need to create an API operation that creates a user. The input parameter would be username+password, but output of this operation should be id+username (without the password).
Let’s create the input schema:
Now let’s define the output schema, and pass it as a response argument to the @api.post decorator:
Django Ninja will use this response schema to:
Nested objects
There is also often a need to return responses with some nested/child objects.
Imagine we have a Task Django model with a User ForeignKey:
Now let’s output all tasks, and for each task, output some fields about the user.
If you execute this operation, you should get a response like this:
Returning querysets
In the previous example we specifically converted a queryset into a list (and executed the SQL query during evaluation).
You can avoid that and return a queryset as a result, and it will be automatically evaluated to List:
Note about async mode
If your operation is async async-support, this example will not work.
FileField and ImageField
Django Ninja by default converts files and images (declared with FileField or ImageField ) to string URL’s.
If you need to output to response image field, declare a schema for it as follows:
Once you output this to a response, the URL will be automatically generated for each object:
Multiple Response Schemas
Sometimes you need to define more than response schemas. In case of authentication, for example, you can return:
In fact, the OpenAPI specification allows you to pass multiple response schemas.
You can pass to a response argument a dictionary where:
Multiple response codes
In the previous example you saw that we basically repeated the Message schema twice:
To avoid this duplication you can use multiple response codes for a schema:
Django Ninja comes with the following HTTP codes:
You can also create your own range using a frozenset :
Empty responses
Self-referencing schemes
Sometimes you need to create a schema that has reference to itself, or tree-structure objects.
To do that you need:
Self-referencing schemes from create_schema()
Async support
Intro
Since version 3.1, Django comes with async views support. This allows you run efficient concurrent views that are network and/or IO bound.
Async views work more efficiently when it comes to:
Django Ninja takes full advantage of async views and makes it very easy to work with them.
Quick example
Let’s take an example. We have an API operation that does some work (currently just sleeps for provided number of seconds) and returns a word:
To run this code you need an ASGI server like Uvicorn or Daphne. Let’s use Uvicorn for, example:
To install Uvicorn, use:
Then start the server:
Note: replace your_project with your project package name
—reload flag used to automatically reload server if you do any changes to the code (do not use on production)
Go to your browser and open http://127.0.0.1:8000/api/say-after?delay=3&word=hello (delay=3) After a 3-second wait you should see the «hello» message.
Now let’s flood this operation with 100 parallel requests:
which will result in something like this:
Based on the numbers, our service was able to handle each of the 100 concurrent requests with just a little overhead.
To achieve the same concurrency with WSGI and sync operations you would need to spin up about 10 workers with 10 threads each!
Mixing sync and async operations
Keep in mind that you can use both sync and async operations in your project, and Django Ninja will route it automatically:
Elasticsearch example
Let’s take a real world use case. For this example, let’s use the latest version of Elasticsearch that now comes with async support:
And now instead of the Elasticsearch class, use the AsyncElasticsearch class and await the results:
Using ORM
Currently, (July 2020) certain key parts of Django are not able to operate safely in an async environment, as they have global state that is not coroutine-aware. These parts of Django are classified as “async-unsafe”, and are protected from execution in an async environment. The ORM is the main example, but there are other parts that are also protected in this way.
There is a common GOTCHA: Django queryset’s are lazily evaluated (database query happens only when you start iterating), so this will not work: